Showing posts with label recipe. Show all posts

Friday, July 15, 2011

5 second Banana Ice Cream!

Not only does it take 5 seconds to make it, you only need 3 ingredients AND you can make it without an ice cream maker! *Gasp* Hold onto your hats folks because this thing is legit!

I totally didn't take any pictures because I was just goofing around, but y'all. It turned out delish! I made a small single serving, but wish I had made a larger one. For myself. Don't judge. I told the hubster about this ice cream a minute later and he said wanted a bite. Um. I totally devoured it in the kitchen. Out of the food processor. My feet never left their spot from start to consumption. So there was definitely no sharing going on. I said, Don't. Judge! Sheesh! Y'all are horrible listeners. At least y'all are awesome readers! <3

The recipe below is for 1 serving, but you might as well go ahead and double your intended serving size because let's be honest. You'll want more than just one serving. Now, let's (attempt to) cool off from this 105 degree weather. Darn Texas heat!!

Banana Ice Cream
I can't remember where I originally saw this recipe, but if you know, let me know so I can give appropriate creds and props to em!!

Ingredients:
½ ripe banana, sliced and frozen (you can use any fruit or a combination of them)
1 tsp vanilla extract
A splash of soy milk (or whatever milk you prefer)

Directions:
1.  Peel and cut your banana into ¼-½" slices. Place banana slices in freezer until frozen.

2.  Place your frozen banana slices, milk, and vanilla extract into your food processor. I used a mini one we received at our house warming 3 years ago and it was the perfect size. Feel free to use the big momma one you received off your wedding registry because it might be collecting dust and is crying to be utilized. Or if you don't have a food processor, a blender works just as good I'm sure! Pulse the food processor/blender until everything is smooth and well blended to the consistency of your liking. Add more milk, if desired.

3.  Scoop, top with toppings, if desired, and serve! Or if you don't feel like sharing, consumption straight out of the food processor/blender is completely acceptable also!
It looks a lil something like this!

Wednesday, July 13, 2011

Easiest Peanut Butter Cookies - Ever!

My parent's were in town 2 weekends ago and since my dad is a rock star in doing numerous house repairs for us, I thought I would make him is favorite cookie - peanut butter! Since making the cookies were a last minute decision, I didn't have all the ingredients to make the traditional peanut butter gooeyness (i.e. no shortening which is muy importante). Then I recalled a recent blogger making peanut butter cookies with only 5 ingredients and took little to no time at all. Perfect!

Flourless Peanut Butter Cookies
replicated from life after lobster from FoodNetwork's 5 Ingredient Fix

Ingredients:
1 cup peanut butter
¾ cup sugar
1 teaspoon vanilla extract
1 egg, lightly beaten

Directions:
1.  Preheat oven to 350F. Place rack in upper middle of oven. Prepare a baking sheet with silicone mat.

2.  In medium bowl, lightly beat egg. Add peanut butter, sugar, and vanilla extract and mix until well combined and batter forms a dough consistency. If mixture is too loose, add a bit of sugar.

3.  Spoon one tablespoon of mixture onto baking sheet making sure cookies are about 1 inch a part. (I love how non-sticky the batter was and rolled up into a ball with ease!) Flatten peanut butter mounds with the back of a fork to make cross hatch lines. Sprinkle coarse salt, your favorite type of jelly, chocolate chips/peanut butter cup, or whatever your heart desires to the top!

4.  Bake until edges are golden brown, about 10 minutes to get slightly chewy in the middle texture. Halfway through baking, rotate sheet to ensure even cooking. Remove from oven, allow to cool about a minute on baking sheet before transferring to cooling rack.
And because I my family devoured them all
so quickly, I have no final picture. But this one
is pretty darn accurate to mine!

Easy peasy right?? You have any super simple/minimal ingredients recipes? Do share!!

Wednesday, May 25, 2011

Easy, Cheesy Chicken Enchiladas

The hubby and I love Tex Mex! The hubs has it for lunch at least twice a week. Enough said. There's just something about the gooeyness of the cheese, the tender meat, fresh tortillas, and don't you dare forget about chips and salsa! Anyone else have trouble refraining themselves from consuming an entire basket (or two) of chips by themselves?? No? Good. Me neither! Right... Darn you Chuy's for your awesome Happy Hour of unlimited queso with ground beef and your drool worthy creamy jalapeƱo ranch dressing!

In my recent attempts of eating healthier and my undying craving for unhealthy foods, this recipe didn't make me feel too guilty with each bite I took. Plus, it was super duper easy to make and even the hubs loved it! He's pro-full fatty foods all the way and refuses to consume anything I make that has a slight healthy spin on it. Needless to say, I had to make sure the hubby stayed out of the kitchen while I prepped this meal so he didn't see the ingredients. However, I did reveal them after he consumed 5 enchiladas. I think I might have persuaded him to try healthier versions of food. Might have.

Cheesy Chicken Enchiladas
Adapted from Annie's Eats

Ingredients:
3 boneless, skinless chicken breasts (use more if you want more meat or substitute it for other types of meat!)
8 oz. Greek Yogurt (I used 0% Fage Greek Yogurt)
8 oz. Light Ranch salad dressing
tortillas (I used low carb whole wheat)
jar of salsa
shredded Mexican cheese

Simple enough right? I was super excited to learn that Greek yogurt is an excellent substitute for sour cream! I have this stuff stashed in my fridge 24/7 yo! Any way, let's cook!

1. Cook chicken breasts by preferred cooking method until cooked through. Set aside to cool a bit.

2. In a large mixing bowl, combine half of the Greek yogurt and half of the Ranch dressing. In a smaller bowl, combine the rest of the yogurt and Ranch dressing. Stir both until well combined. Shred or chop the cooked chicken and add to the large mixing bowl. Mix well with sauce.

3. Preheat the oven to 375°. Spray a 9 x 13″ pan with cooking oil. Take one tortilla and top with a little less than 1 tbsp. of the sauce from the small bowl. Spread over the tortilla in an even layer. Add some of the chicken mixture to the center of the tortilla. Top with salsa to taste. Sprinkle with shredded cheese, to taste. Roll up tortilla and place, seam side down, in the prepared baking dish. Repeat with remaining ingredients. This does get a lil messy so I suggest doing this on a plate or cutting board for ease of clean up later on.

4. Bake in oven for 25-30 minutes (30 for a crispier tortilla). I baked it for 27 minutes. Allow to cool a few minutes before serving.

Look at all the gooeyness flowing out!! nom nom nom

That's it!! This was soooooo good y'all. I made it for dinner last week, and the hubby has already requested it for dinner again. Healthy rendition and all!

What's your favorite Tex Mex food and why??

Tuesday, May 17, 2011

Chicken Improv

You're probably tired of all the chicken recipes I've been posting lately (sorry! I'm on a cleanse. More on that later on), but at least I'm alternating them with other types of meat right?? For the first time ever, I took a running recipe and made my own ingredient substitutions and guess what? I really, really liked the flavor! I'm not going to lie, I patted myself on the back afterwards because I was so darn proud of myself. Ha! The original recipe made 4 servings, but I used half the amount of chicken while keeping everything else constant. Why? Because I usually only have 2 servings worth of chicken defrosted at a time. Plus, who doesn't like a lil extra sauce!

Okay, I'll quit jibber jabbering and show you what I made!

Basil, Chili, and Garlic Chicken
Recipe adapted from Rachel Ray

Ingredients:
2 tbs fish sauce
2 tbs soy sauce
4 tsp sugar
1 tsp crushed red chili pepper (feel free to add more if you really want a kick)
1/2 pound thin Asian rice noodles or vermicelli pasta (or rice)
1/2 cup thinly sliced onion
1 cup finely chopped shallots
1 (green) bell pepper, diced
8 cloves garlic, finely chopped
1/2lb skinless, boneless chicken breasts, cut into bite-size pieces
1 cup torn fresh basil leaves (I used 1/16 cup of McCormick's dried basil leaves)
1 tsp cornstarch
1 tsp garlic salt
1 tsp ground pepper
cooking spray

Gathered all the ingredients and have everything all diced and chopped up? Awesome! Let's get the cooking party started!


1. In a bowl, season chicken bites with salt and pepper; set aside. In a separate small bowl, combine the fish sauce, soy sauce, sugar, cornstarch, and crushed red pepper. Stir to dissolve the sugar and cornstarch; set aside.

2. Cook your pasta/vermicelli/rice according to directions.

3. Meanwhile, thinly coat a large, deep skillet with cooking spray (or 2 tbs of vegetable oil) and heat over medium-high heat until hot. Toss in onions, shallots, bell peppers, and garlic. Stir-fry until fragrant and softened but not browned. Transfer the mixture to a bowl and set aside.

4. Coat skillet with another thin layer of cooking spray and heat for about 30 seconds. Spread the chicken in a single layer in the pan without crowding and cook, undisturbed, until the edges change color. Turn and continue cooking, occasionally tossing, until lightly browned all over. Give the reserved sauce a quick lil stir then add it and the onion mixture to the skillet. Cook while tossing until the chicken is cooked through and evenly coated. Remove the pan from the heat and add the basil, tossing until evenly coated (if you're using fresh basil, toss until slightly wilted). Serve the chicken over cooked noodles/vermicelli/rice.
Ta da!

I think the shallots really added a lil something extra to the dish. Feel free to add additional vegetables also to make it even more flavorful/healthy. If you don't like it to be too saucy, you can easily half the sauces. The sauce was also slightly thick so thin it out a bit with 1/4 cup of water. Otherwise, easy, peasy, yummy chicken dinner for the win, once again!

Are you tired of my chicken recipes yet? If so, substitute the chicken with pork, beef, shrimp, or any meat of your choice! How's that for changing it up? Ha!

Tuesday, May 10, 2011

Busting out the grill

The weather in Texas has been a comfortable lower 90's / upper 80's the past week and I'm totally loving it (minus the ridiculous 40 mph wind we've been getting the past two months)!  Yay to shorts and sandals and boo to burning my ba-donka-donk on leather seats in the car. Warmer weather also means it's time to bust out the good ole grill!! There's something a grill does that adds a lil extra oomph to flavors. Perhaps it's the smokiness? Whatever it is - I like it. Plus, what's not to like about a simple dinner that requires a quick seasoning/marinating of the meat the night before and tossing it on the grill for a few minutes the next day? We're all about simple, quick, and delicious meals at this household!

Last night's dinner - Cuban marinated pork tenderloin!
Recipe adapted from elly says opa!

Ingredients:
1lb pork tenderloin
1/4 cup orange juice (about 1 orange)
2 Tbsp lime juice (about 1 lime)
3 Tbsp. canola or olive oil
2 bay leaves
3-4 garlic cloves, smashed (we're garlic lovers so I tossed in an extra 3!)
2 tsp cumin
1 tsp oregano
salt and pepper
I also added in half a cup of sliced onions

Gathered all your ingredients yet? Great! Let's marinate!

1. Combine all the ingredients and pour into a resealable bag with the pork tenderloin. I used a gallon size Ziploc bag. Marinate several hours (or in my case, overnight).

2. Grill the tenderloin, basting with the marinade as you grill, until internal temperature reaches 140°, approx. 20-25 minutes.

3. Set tenderloin aside to rest for 7-10 minutes, underneath an aluminum foil tent. Slice and consume!

I was starving and totally forgot to take a pic, but this
one is pretty darn accurate to what ours looks like.

We had this with steamed broccoli (for me) and garlic mashed potatoes (for the hubs). The tenderloin was juicy and tender and definitely full of flavor!

What's your favorite part of grilling? Do share seasoning mixes and marinating recipes!

Wednesday, May 4, 2011

Chicken and Cashews

At our house, we almost always have chicken defrosting in the fridge. Work has been extremely hectic this year and I got home late last night so I whipped out this recipe because it's super easy and quick to make. Plus, I got the "I don't eat greens" hubby to eat a good chunk of the bell peppers. Yay for some veggies in his diet!!

Chicken and Cashew Stir Fry
Recipe adapted from Epicurious

Ingredients:
1 bunch scallions, separating white and green parts
1 pound skinless boneless chicken thighs (I used chicken breasts instead)
1/2 teaspoon salt
1/4 tsp black pepper
3 tbs vegetable oil
1 red bell pepper, chopped
4 garlic cloves, finely chopped
1 1/2 tbs finely chopped peeled fresh ginger (I used less because ginger can be overwhelming, but if you like the extra kick feel free to add even more!)
1/4 tsp dried hot red-pepper flakes
3/4 cup reduced-sodium chicken broth
1 1/2 tbs soy sauce
1 1/2 tsp cornstarch
1 tsp sugar
1/2 cup salted roasted whole cashews

Gathered and portioned out everything? Great! Let's cook!

 
1. Cut the chicken breasts into 3/4-inch chunks and toss with salt and pepper.
 

2. Heat oil in skillet over high heat. Add chicken and cook until just cooked through, about 4 to 5 minutes. Don't overcook it or it'll be dry and rubbery. Ew! Transfer to a plate with a slotted spoon (mine didn't produce excess liquid so I just dished it all over into a bowl via tilting my skillet and shoveling the chicken out with my spatula).  
 

3. Add the bell pepper, garlic, ginger, red-pepper flakes, and scallion whites (some of the scallion greens got in there. Oops. Oh well!) to the skillet and stir-fry until peppers are tender, about 5 minutes.

4. Stir together chicken broth, soy sauce, cornstarch, and sugar and add to the vegetables.
 

5. Reduce the heat to medium and simmer, stirring occasionally, until thickened, about 1 to 2 minutes.

Like this! I'm talented, what can I say!

6. Stir in cashews, scallion greens, and chicken along with any juices accumulated on plate. I didn't have any cashews and wasn't in the mood to go to the store and pick some up just for this recipe so I made cashew-less chicken stir fry. Then plate and consume!


As always, I had this with jasmine rice and braised baby bok choy. The flavor turned out alright, but it could definitely use some additions, but the simplicity of this recipe won it over. Next time, I think I'll marinate/season the chicken with some soy sauce along with the salt and pepper and cook it with garlic. Who doesn't love extra garlic right? We sure do! The hubby and I love onions and mushrooms so I'll definitely add that next time. And maybe some green bell peppers too. Plus, isn't stir fry all about tossing together whatever ingredients you have/want any way?  Definitely!

What's your favorite stir fry? And suggestions on what changes you would make to this recipe?

Friday, April 15, 2011

Happy Friday!!

Guess what I did last niiiiight?? *hopping foot to foot with excitement* Oh come on!! Take a guess! (waits for response). Eh! Nope! Okay, okay, okay, I'll tell you, or rather show you! Look what IIIII made...

Chocolate Thin Mint Cupcakes with Mint Chocolate Frosting

I finally had the opportunity to make these guys and was super stoked!! Seriously. I was doing a happy dance when I pulled the first batch out of the oven. The hubs shook his head in disbelief he married this crazy lady, but it's okay, our marriage is set in stone and I was elated with satisfying my baking itch. The frosting turned out runnier than I expected. Maybe I should have added more powdered sugar? It was awfully sweet already though... Hm...  

Chocolate Thin Mint Cupcakes with Mint Chocolate Frosting (try saying that five times fast!)
Recipe replicated from The Farm Girl

Ingredients:
Cupcakes:
½ c. Dutch-process cocoa powder
½ c. hot water
2 c. all-purpose flour
¾ t. baking soda
¾ t. baking powder
¾ t. coarse salt
1 c. butter, softened
1½ c. sugar
2 large eggs plus 1 egg yolk
1¾ t. vanilla extract
2/3 c. sour cream, at room temperature
1 box Thin Mints
 
Frosting:
Mint Chocolate Buttercream Frosting
6 T. butter, softened
1/2 c. cocoa, for medium flavor
1/3 c. milk
3 1/2 c. powdered sugar
1 t. mint extract

Got everything together? Great! Let's satisfy that mint chocolate craving (and getting rid of that LAST box of Thin Mint cookies)

Alright, first things first, pre-heat the oven to 350 degrees. Line your cupcake pans with paper liners and place one Thin Mint cookie in each liner.


In a small bowl, whisk together the cocoa powder and hot water until smooth.


In a medium bowl, whisk together the flour, baking soda, baking powder, and salt; set aside.

Did I do fabulous job of mixing or what?!

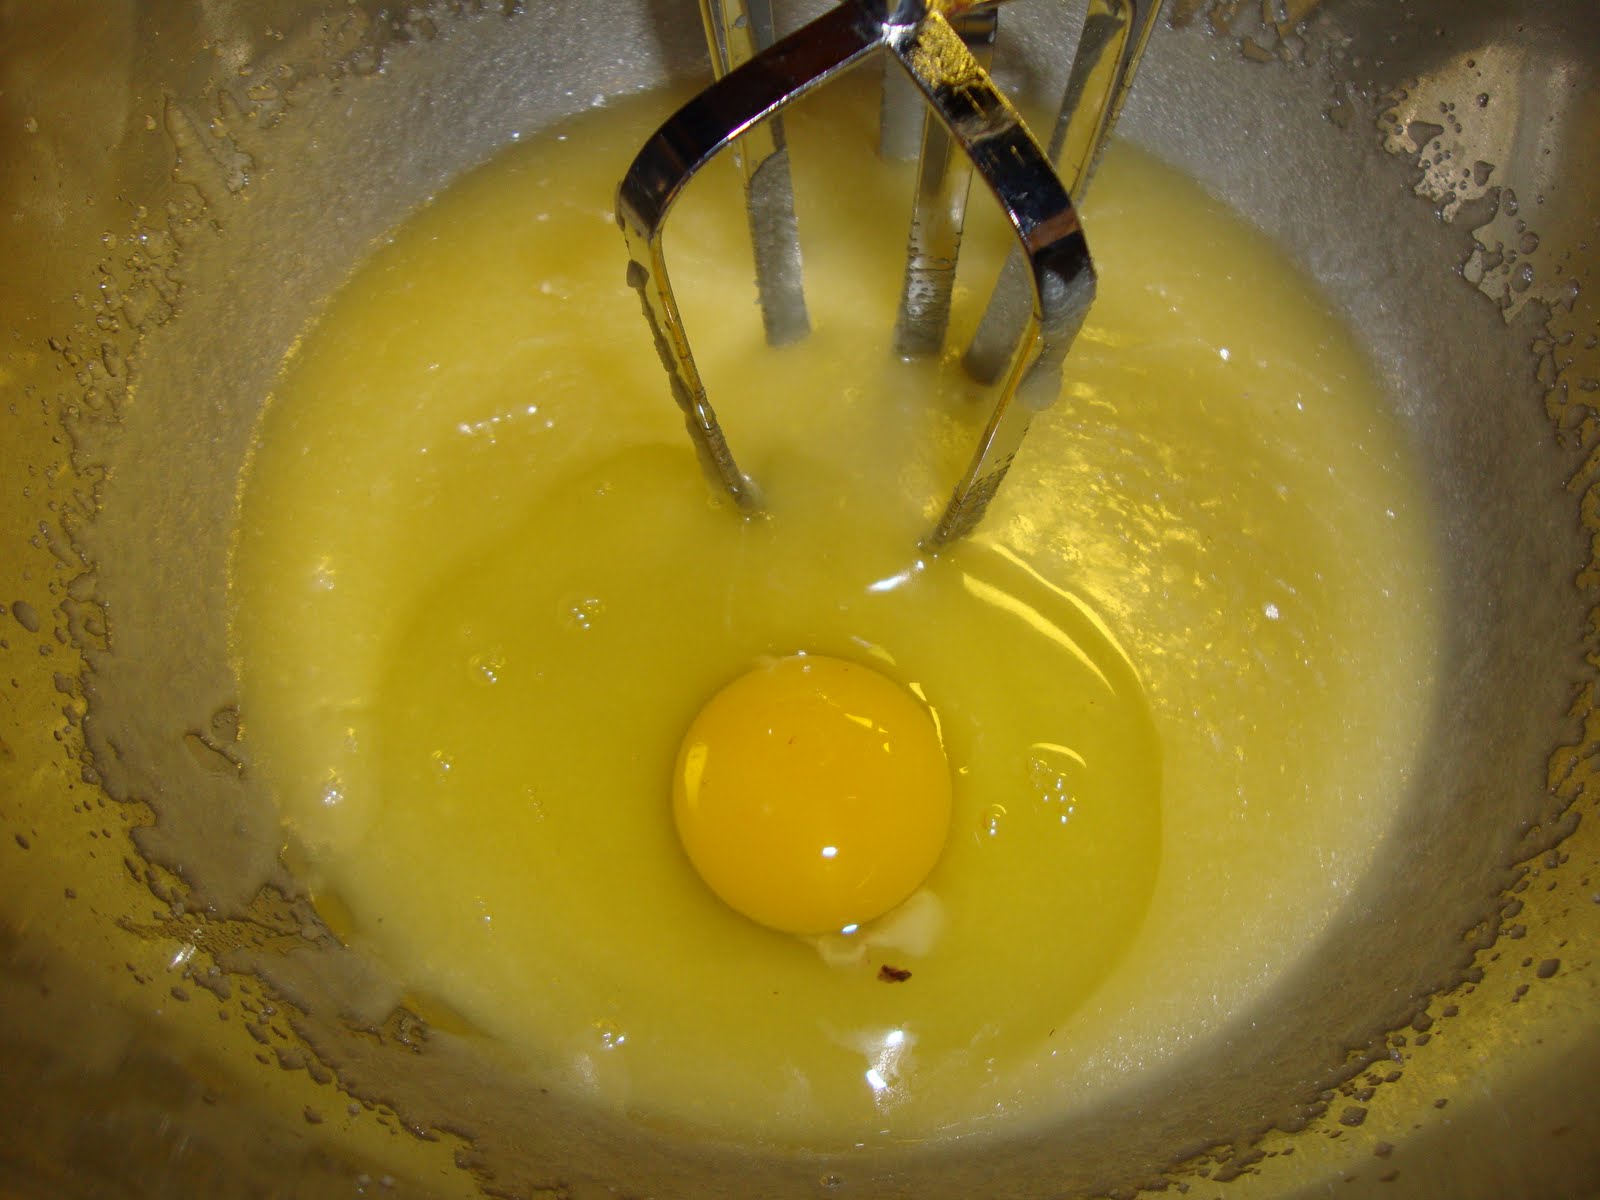
In a medium saucepan, combine the butter and the sugar over medium heat.  


Heat, stirring occasionally to combine, until the butter is melted.

Like this!

Transfer the sugar and butter mixture to an electric mixer bowl.  Beat on medium-low speed for 5 minutes, until the mixture is cooled.  

Not in a KitchenAid Mixer, but I told the hubs if this
mixer makes these recipes okay, I'll stop obsessing
daydreaming about the coveted KitchenAid Mixer

Mix in the eggs and egg yolk, one at a time, and beat well after each addition.


Mix in the vanilla and then the cocoa mixture and beat until incorporated.  


And just to show you what my mixer does - it mixes with centrifugal force so it looks like this, therefore, I have to hand scrape down the sides simultaneously as the mixer is mixing to get the above picture results, but I digress.


With the mixer on low speed, add in the dry ingredients in two batches, alternating with the sour cream, beating just until combined.

I forgot to take a picture of the completed batter. Sorry!

Fill the cupcake liners about ¾ full

I wiped up the splatters prior to putting the pan in the oven

and bake for 17 minutes or until a toothpick inserted in the center comes out clean, rotating the pans halfway through baking.  Meanwhile, let's make the frosting!! Combine the butter, cocoa powder, milk, powdered sugar, and mint extract and mix until smooth.  


When the timer says baking time is up! Remove the cupcakes from the oven and allow it to cool in the pan for about 10 minutes


then transfer to a wire rack to cool completely.

Apparently, I need to quit taking overhead shots. Oops!

And last, but definitely not least - frost with lots of frosting (since mine turned out runny, it wasn't very pretty and made a big ole mess on my counter. Maybe the "missing" ingredient is heavy cream instead of milk??) and consume! The decision to share is purely up to you!

Ta da!! Not pretty, but they tasted yummy!!

And since I ran out of Thin Mints on my second batch (I may or may not have eaten one. or two Thin Mints at the beginning of this baking extravaganza. Don't judge!), I just poured the cupcake batter in the liner and they came out HUGE like muffins instead of cupcakes. So weird!!! I wonder why....


Happy Friday everyone, and have a fabulous weekend!!!

Thursday, March 24, 2011

Chicken Soup for the Soul

No, not this Chicken Soup for the Soul:
Although I remember those inspirational books being uber popular during grade school days. I'm talking about this chicken soup for the soul:


You see, I was craving something brothy (is that a word??) the other night (why? I have no idea. I just did!) and it got me drooling thinking about all the different soups my dad used to make for dinner. It made a nightly appearance at dinner, no matter what. Soup just gives off that special warm, fuzzy feeling. *snuggle*

I previously mentioned my dad is the most awesome chef - ever! Unfortunately, the seasoning in his (non-existent) recipes consist of one thing - "you just taste it", and I can't cook anything without a written down, precisely measured recipe!

Ladies and gentleman, embrace yourself because I made my dad's chicken soup last night, without a recipe! I seasoned it by "just taste it" and it actually turned out good! Not great, but good (it was a little on the sweet side and I overcooked the chicken because I didn't turn the pot off in time. wah wah waaaah).

The following recipe requires a trip to the Asian market. On the other hand, you can pick up a lot of stuff while you're there and it's usually a little cheaper than regular grocery stores. Especially in the vegetables department! Just don't mind the grimy floors and the potential bumping and pushing of other patrons with their shopping carts... Have I already turned you away from making this recipe?? Oops! You could always order stuff via the internet! That's what we all do now days any way right??

Recipe was adapted from my dad!

Ingredients:
Cornish hen
2 handfuls of Dried lycium fruits*
8 pieces of Rhieong Dioscoreae*
3-4 pieces of Codonopsis pilosula root*
1 tsp Monosodium glutamate
Sugar
Salt

Note: Normally, it's cooked in a regular pot for 50 minutes, but I didn't want to wait that long after I get home from work so I stuck it in a crockpot!

1. Rinse off your hen. If you prefer lean soup, remove all the skin from the hen. Place the hen into the crockpot and fill with water about 3/4 full. Add the dried lycium, rhieong dioscoreae, and codonopsis pilosula root into the crockpot.** Cook on low for 5-6 hours.


2. Season with sugar, salt, and very, very little MSG to your liking. Spoon out the chicken and broth into a bowl and serve with rice. And since I forgot to take a picture of it plated last night, here's a pic from my lunch leftovers!

I like to combine my rice and soup, but you can serve
each item separately to avoid "cross contamination"

And that's it! Comfort food in mah belly!! What's your favorite comfort food? Are there any recipes your parents used to make that you (would) replicate?

Oh! and while I was prepping dinner, this is what the two girls we're doing:

They make baby dog-sitting a breeze!


*At the Asian market, these can be found packaged together in the spice aisle. The pre-packaged ones also include additional spices, but I find them unnecessary. I prefer to buy the spices individually to avoid waste and have plenty for next time!

**If you don't mind waiting or normally have a later dinner, cook the hen and spices in a regular pot on high until it begins to boil. Turn the temperature down to medium-low, and cook for 50 minutes.

Thursday, March 17, 2011

My Love-Hate Relationship: Chicken

To prepare yourself, let's all stand up and do the chicken dance! Why? Because I think it's an awesome idea and who doesn't love a little exercise? Here, I'll even include the soundtrack so you don't have any excuse to not participate mkay!


All warmed up? Good! Zumba's got nothing on you honey! Oh, who am I kidding. Only I was lame enough to google blogger (can I use Google as a verb when web searching within other applications??) on how to embed a song in a post, then test it out by playing the entire song and performing the chicken dance to the best of my ability prior to settling down in sweat to finish this post. Phew! Talk about a l o n g sentence. It probably isn't grammatically correct either. My grade school English teachers would be so disappointed. Tsk tsk.

Um, wow! That was quite an intro to today's (eh) post, so if you wanna leave now while I'm still ahead of the game - cool! If not, proceed with caution (why, I'm not sure...)!

Chicken. I probably eat this meat way too often. Don't get me wrong, I love me some chicken and it can be prepped in so many ways, but chicken is, well, chicken. It can get boring so I took a small break from it beginning of February. Last week, I started having chicken withdrawls. So chicken for dinner it is! Super easy peasy new recipe too? Even better!

Hoisin Five-Spice Chicken
Recipe adapted from Elly Says Opa! who adapted it from Cathy's Kitchen Journey who adapted it from Epicurious. Check out Elly's blog to get the full story.

Ingredients
4-6 chicken drumsticks (I used chicken breasts instead)
1/4 cup hoisin sauce
1/2 tsp. Chinese 5-spice powder
2 cloves garlic, minced
1 Tbsp. honey
1 Tbsp. soy sauce
Amount of red pepper flakes to your liking


Step 1 - combine all the ingredients in a bowl and let the chicken marinate overnight in the fridge (30 minutes should be sufficient as well if you leave it out at room temperature, but you know how marinating goes, the longer, the better!)

It looks like a heart (to me)! I sent this
picture to the hubby, but he said it looked
like something else...

Step 2 - I had this with rice so if you want to as well, I would start that now. If not, then skip this step, of course and proceed to Step 3.

Step 3 - Pre-heat the oven to 425 degrees. Remove the chicken from the marinate and place it into a baking dish. I also drizzled the leftover marinade into the baking dish. This may or may not make cleaning more difficult afterwards. Since you're smarter than me, you probably lined your baking dish with something and made clean up a snap. Yea, I definitely didn't. Thank goodness we're internet friends so I don't have to hear you laughing hysterically at me. :) 

When the oven beeps to let you know it's ready for your chicken, slide the baking dish into the top third of the oven and cook for about 25 minutes (or when it's cooked through). Since the hubby wasn't home, it means veggies for me! Sweet! I made some stir fry baby bok choy with oyster sauce and soy sauce.

Step 4 - When the oven beeps again to notify you its job is complete, remove the baking dish, plate the chicken, scoop some rice over, and add the bok choy.

TA DA! Easy peasy winner winner chicken dinner!

Chicken, hope you've forgiven me for abandonening you for so long. I mean, you got an entire post dedicated to you today so we're cool now right?

What's your take on chicken? Any (simple) yummy chicken recipes to share?


P.S. Why am I talking to chicken breasts like it's human and has feelings? Skurry!

Wednesday, March 16, 2011

Girls Just Wanna Have Fu-un - Cyndi Lauper

Especially when it comes to cooking and baking! I recently got the cooking and baking itch and have been cooking at every opportunity possible. It's a learning process since I'm not a natural cook by any means. No recipe = no cooking! My dad is an awesome chef, but all his recipes are seasoned with "you just guess" or "you just taste it". Say whaaa?! I couldn't ever tell what the missing ingredient was so I gave up cooking all my dad's recipes. How I miss home cooking... Anyway, thankfully, the recipes I've been making recently actually turned out well (minus a few overcooked meats and vegetables here and there... Hey! I said it was a learning process okay! Slow and steady wins the race right?). So maybe there's hope for me to eventually learn my dad's recipe! Yay! Until then, I'll stick to known, pre-measured recipes. First up, last night's dinner of beef chow fun!

This recipe caught me by surprise because when I read the title, I expected beef flat noodles (幹炒牛河) and the hubby and I LOVE that! It's a common staple we order at a Chinese restaurant, but I should have known because this recipe calls for black bean sauce and there's none of that in beef flat noodles. And the title was called Beef Chow Fun, not Beef Flat Noodles. Oh well. Once again, people - learning process!!

The recipe was adapted from Healthy Weight Healthy Heart

Ingredients
8 ounces wide rice noodles (I used pre-cooked rice noodles)
1/2 cup Shao Hsing or dry sherry (I didn't have either so I used rice wine vinegar instead)
4 teaspoons black bean-garlic sauce
1 tablespoon soy sauce
2 teaspoons brown sugar
2 teaspoons cornstarch
4 teaspoons canola or peanut oil, divided
1 teaspoon minced ginger
1 small onion, thinly sliced
1 12-ounce bag fresh Asian stir-fry vegetables
1/2 cup water, divided
8 ounces sirloin steak, cut into thin slices

Firstly, I cut up all my vegetables and meat. I left out the bag of vegetables because the hubby doesn't like veggies, but how I wish I could have added them. I LOVE me some veggies! Meanwhile, I did slice up some green onions for presentation. It's an Asian dish right - green onions / scallions are a must! Since I somewhat, but not really cheated by buying pre-prepped/cooked noodles, I just peeled each noodle bundle into individual strips and was good to go! Talk about a time saver and quicker to having dinner ready to eat. Plus, I didn't have to play the guessing game of when the noodles were cooked al dente. Efficiency for the win!

I know the noodles aren't peeled. but I forgot to take a
picture of the peeled noodles so just use your imagination
for this one mkay? Thanks!

Oh, and if you're curious as to what type of noodles I bought:

Then I prepped my sauce by combining in a small bowl the rice vinegar, black bean sauce, soy sauce, brown sugar, and corn starch; set it aside.


Now onto cooking like a pro! Heat up some oil in the skillet over medium-high heat (oil is the only ingredient I never measure and just eyeball) then reduce the heat to medium. Add the ginger and cook for about 20 seconds (the recipe says 30 seconds, but mine started burning around 20. It could be my oil was too hot though. Oops!).  

Toss in the onions and cook for about 1 1/2 minutes or until they're softened.
See, burnt ginger - oops! Don't do that! 

Once it's all cooked, transfer the vegetables to the bowl with the noodles.

Return the skillet to the stove, heat up some more oil in the skillet, add the steak, and cook for about 1 1/2 minutes. It will still look a bit rare in the center, but since you'll be combining all the ingredients soon and continue cooking, you don't want to overcook the meat and have it come out tough and chewy. Like mine did. Do as I say, not as I do! Stir the reserved sauce and add it to the pan. Stir the sauce with the meat until it has slightly thickened.

Crazy steam action. Maybe the temp is too high??

Toss in the noodles and vegetables to the pan along with 1/4 cup  of water. Toss everything to coat it with the sauce and everything is heated through. Then, transfer everything to a plate, top with scallions, and consume!!

See! Peeled noodles!!

For a non-chef like me, I was pleasantly surprised at how easy this recipe turned out! Next time, I would add in some red pepper flakes to give it some spice, but since I didn't realize it till the cooking fiasco was finished, I just added Sriracha sauce instead.

What's your favorite recipe, and do share because I'm looking to expand my cooking repetoire!

LinkWithin

Related Posts Plugin for WordPress, Blogger...